
Create and deploy a complete CI/CD pipeline using Jenkins, starting with instance setup
💡 Introduction
Welcome to the world of Cloud and Automation! If you're someone who's eager to get hands-on with real-world DevOps tools and practices, you're in for a treat. In this blog, we’ll walk through how to deploy an Amazon Clone built with Node.js to an AWS EC2 instance, running inside a Docker container.
But that’s not all — we’ll be using Terraform to provision our infrastructure and Jenkins to automate the entire CI/CD pipeline. This is a beginner-friendly yet powerful project that combines cloud provisioning, containerization, and automation — three pillars of modern DevOps.
Whether you’re just starting out or looking to solidify your skills, this guide will help you get a solid grasp on how things work in a real-world deployment workflow.
So without further ado, let’s dive in and bring this project to life! 🌐🐳⚙️
💡 Pre-Requisites
Before we roll up our sleeves and start deploying, let’s make sure you’ve got everything set up and ready to go. Here are the essentials you’ll need for this project:
✅ An AWS Account — You should have an AWS account ready with an IAM user that has full EC2 access and AWSCLI configured. This is where we’ll be provisioning our infrastructure.
🐳 Basic Knowledge of Docker — You don’t need to be a Docker expert, but having a basic understanding of images, containers, and how Dockerfiles work will help you a lot during this project.
If you're new to either of these tools, no worries — I’ll walk you through each step. Now that you’re geared up, let’s move on to setting up our infrastructure with Terraform!
💡Step 1: Test the Application Locally
Before we jump into cloud deployment, it’s always a good idea to test the application locally. This helps ensure everything works as expected before we automate it.
Our Amazon Clone app (built with Node.js) is hosted on . Clone the repository using the following commands:
git clone https://.com/Pravesh-Sudha/amazon-clone.git
cd amazon-clone/
Now, ensure your Docker engine is running. We’ll build the Docker image for the Amazon Clone:
docker build -t amazon-clone .
This command will build the image and tag it as amazon-clone:latest.
Once the image is ready, run the container with the following command:
docker run -p 3000:3000 --name amazon-clone amazon-clone:latest

Now, open your browser and navigate to:
http://localhost:3000
You should see the Amazon Clone application running locally! 🎉

🛠️ Step 2: Install Terraform
With local testing complete, it’s time to move towards the cloud. We'll provision infrastructure on AWS using Terraform.
If you're on Ubuntu (amd64), install Terraform using the following commands:
sudo apt install wget -y
wget -O- https://apt.releases.hashicorp.com/gpg | sudo gpg --dearmor -o /usr/share/keyrings/hashicorp-archive-keyring.gpg
echo "deb [signed-by=/usr/share/keyrings/hashicorp-archive-keyring.gpg] https://apt.releases.hashicorp.com $(lsb_release -cs) main" | sudo tee /etc/apt/sources.list.d/hashicorp.list
sudo apt update && sudo apt install terraform
To verify the installation:
terraform -version
If you've already configured the AWS CLI with your IAM user credentials, you’re all set. Terraform will use that configuration to create resources.
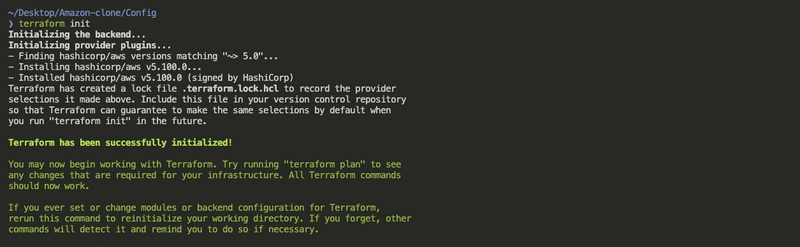
Now initialize the Terraform setup:
cd amazon-clone/Config
terraform init
⚙️ Step 3: Configure Terraform Before Apply
Before running Terraform, we need to tweak the default EC2 configuration. Open the file: Config/main.tf.
Here’s the block that needs your attention:
resource "aws_instance" "web" {
  ami                    = "ami-020cba7c55df1f615"   # ✅ Replace with your preferred Ubuntu AMI ID
  instance_type          = "t2.medium"
  key_name               = "default-ec2"             # ✅ Replace with your actual key pair name from AWS
  vpc_security_group_ids = [aws_security_group.Jenkins-sg.id]
  user_data              = templatefile("./install_tools.sh", {})

  tags = {
    Name = "amazon clone"
  }

  root_block_device {
    volume_size = 30
  }
}
AMI ID: Use an Ubuntu AMI (you can find it in your AWS EC2 console).
Key Name: Use a valid key pair name that exists in your AWS account. If you don’t have one, go to the EC2 dasard → Key Pairs → Create Key Pair.
📜 What is install_tools.sh?
Notice the user_data script in the Terraform config:
user_data = templatefile("./install_tools.sh", {})
This Bash script will automatically install tools like:
Docker
Jenkins
SonarQube
Trivy
And any other dependencies required
So no need to SSH into the instance and manually set them up — just sit back and let Terraform + cloud-init do the job!
🚀 Step 4: Apply the Terraform Configuration
Now, let’s deploy the infrastructure:
terraform apply --auto-approve
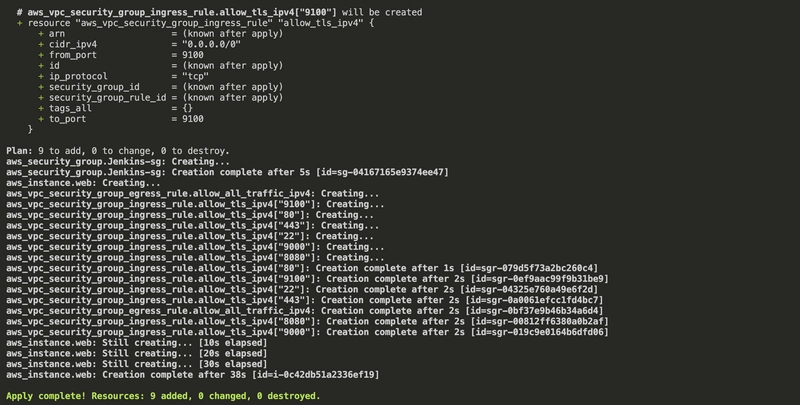
Give it a few minutes (around 5) — Terraform will spin up the EC2 instance with the required configuration. Once it’s up, you’ll have an environment ready to run the Amazon Clone app inside a Docker container, with all necessary tools installed.
🔧 Step 5: Setting Up SonarQube and Jenkins
Now that our EC2 instance is up and running — and our install_tools.sh script has pre-installed Jenkins and SonarQube — let’s start setting them up for use in our CI/CD pipeline.
✅ Accessing SonarQube & Generating Token
Go to your browser and visit:
http://<Your-EC2-Public-IP>:9000You’ll land on the SonarQube login screen.
Use the default credentials:
* **Username:** `admin`

* **Password:** `admin`

After the first login, SonarQube will prompt you to change the default password.
Once logged in, go to:
Administration → Security → Users → TokensClick Generate Token, give it a name like
jenkins, and copy/save the token safely — we’ll use it later to integrate with Jenkins.

🛠 Step 6: Setting Up Jenkins
🔐 Get Jenkins Admin Password
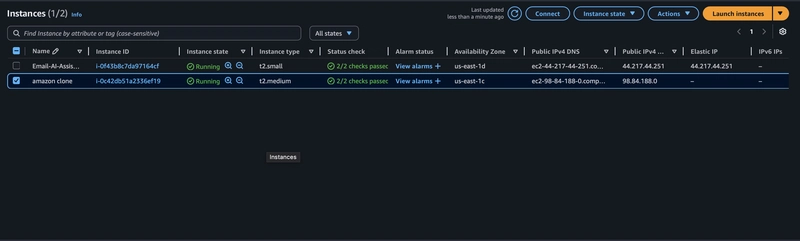
Head to your AWS EC2 Dasard.
Select your running
Amazon Cloneinstance.Click Connect → EC2 Instance Connect.

Once inside the instance, run:
sudo su
cat /var/lib/jenkins/secrets/initialAdminPassword

Copy this password and go to your browser:
```bash
http://<Your-EC2-Public-IP>:8080
```
Paste the password to unlock Jenkins and click Continue.
Choose Install Suggested Plugins.

Set up your first admin user (I named mine admin, feel free to choose your own).

🧩 Install Required Jenkins Plugins
Go to:
Manage Jenkins → Plugins → Available Plugins
Install the following:
Eclipse Temurin Installer
SonarQube Scanner
NodeJS Plugin
Docker Pipeline
Docker Commons
Docker API
Docker Build Step

Once installed, restart Jenkins.
🔐 Add SonarQube Token in Jenkins Credentials
Now let’s securely store the token we generated from SonarQube.
Navigate to:
Manage Jenkins → Credentials → Global → Add Credentials

Choose Kind: Secret Text
Paste the SonarQube token here.
Give it an ID like
jenkins.

📦 Create Sonar Project & Token
Now go back to:
http://<Your-EC2-Public-IP>:9000
Create a new project manually.
Give it a name like
Amazon.Choose locally and generate another token for this project.


🐳 Add DockerHub Credentials to Jenkins
Let’s store DockerHub credentials for pushing images from Jenkins.
Go to:
Manage Jenkins → Credentials → Global → Add Credentials

- Select:
* **Kind:** Username and Password

* **Username:** Your DockerHub username

* **Password:** Your DockerHub password

* **ID:** `docker`

🧰 Step 7: Install Tools in Jenkins
Let’s configure all necessary tools for our CI/CD pipeline:
☕ JDK Installation
Go to:
Manage Jenkins → Tools → JDK installationsClick Add JDK
Name it
jdk17, check Install automaticallySelect:
* **Install from** [**adoptium.net**](http://adoptium.net)

* **Version:** `jdk17.0.9.1+1`

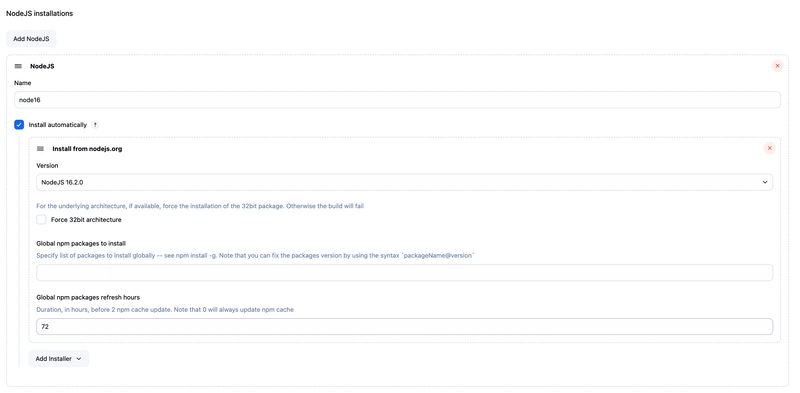
🟢 Node.js Installation
Still under Tools:
Add NodeJS installation.
Name:
node16Version:
16.2.0
🐋 Docker Installation
Add Docker.
Enable Install Automatically
Version:
latest

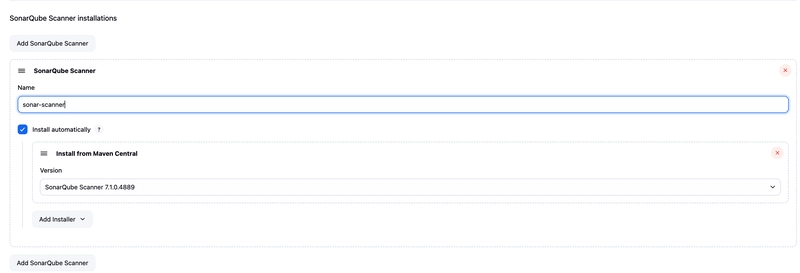
📊 SonarQube Scanner Installation
Add SonarQube Scanner
Name:
sonar-scanner
🛡️ OWASP Dependency Check
- Add:
* Name: `DP-Check`

* Check: **Install Automatically**

* Install from: [`.com`](http://.com)

🌍 Step 8: Configure Global SonarQube Settings
Now link Jenkins with your SonarQube server:
Go to:
Manage Jenkins → SystemScroll to SonarQube Servers
Add a new server:
* **Name:** `sonar-server`

* **Server URL:**
    ```bash
    http://<Your-EC2-Public-IP>:9000
    ```
* **Authentication Token:** Choose the credential ID (`jenkins`) created earlier

This completes our SonarQube and Jenkins setup — all tools and integrations are ready for our CI/CD pipeline. 🎯
🔁 Step 9: Create Jenkins Pipeline for CI/CD
Now that Jenkins is fully configured with all the necessary tools and integrations, it's time to bring everything together in a Jenkins Pipeline.
🏗 Create a New Pipeline Job
Go to your Jenkins Dasard.
Click New Item → Select Pipeline → Name it
amazon-clone.Scroll down to the Pipeline Script section.
Paste the following Jenkinsfile code:
pipeline {
    agent any
    tools {
        jdk 'jdk17'
        nodejs 'node16'
    }
    environment {
        SCANNER_HOME = tool 'sonar-scanner'
    }
    stages {
        stage('Clean Workspace') {
            steps {
                cleanWs()
            }
        }
        stage('Checkout from Git') {
            steps {
                git branch: 'main', url: 'https://.com/Pravesh-Sudha/amazon-clone.git'
            }
        }
        stage('SonarQube Analysis') {
            steps {
                withSonarQubeEnv('sonar-server') {
                    sh '''$SCANNER_HOME/bin/sonar-scanner \
                    -Dsonar.projectName=Amazon \
                    -Dsonar.projectKey=Amazon'''
                }
            }
        }
        stage('Quality Gate') {
            steps {
                script {
                    waitForQualityGate abortPipeline: false, credentialsId: 'jenkins'
                }
            }
        }
        stage('Install Dependencies') {
            steps {
                sh 'npm install'
            }
        }
        stage('OWASP FS Scan') {
            steps {
                dependencyCheck additionalArguments: '--scan ./ --disableYarnAudit --disableNodeAudit', odcInstallation: 'DP-Check'
                dependencyCheckPublisher pattern: '**/dependency-check-report.xml'
            }
        }
        stage('Trivy File System Scan') {
            steps {
                sh 'trivy fs . > trivyfs.txt'
            }
        }
        stage('Docker Build & Push') {
            steps {
                script {
                    withDockerRegistry(credentialsId: 'docker', toolName: 'docker') {
                        sh 'docker build -t amazon-clone .'
                        sh 'docker tag amazon-clone pravesh2003/amazon-clone:latest'
                        sh 'docker push pravesh2003/amazon-clone:latest'
                    }
                }
            }
        }
        stage('Trivy Image Scan') {
            steps {
                sh 'trivy image pravesh2003/amazon-clone:latest > trivyimage.txt'
            }
        }
        stage('Deploy to Container') {
            steps {
                sh 'docker run -d --name amazon-clone -p 3000:3000 pravesh2003/amazon-clone:latest'
            }
        }
    }
}
📌 Don’t forget to update:
- The DockerHub username (
pravesh2003) with your own Docker ID.
🔍 Quick Breakdown of What’s Happening
This pipeline covers the entire DevSecOps lifecycle:
Clean Workspace: Clears the previous build directory to avoid conflicts.
Git Checkout: Pulls the latest code from your repository.
SonarQube Analysis: Analyzes code quality and vulnerabilities.
Quality Gate: Ensures the code meets SonarQube's quality thresholds before continuing.
Install Dependencies: Installs Node.js dependencies via
npm.OWASP FS Scan: Scans for known dependency vulnerabilities.
Trivy FS Scan: Performs a filesystem security scan for additional security insights.
Docker Build & Push: Builds the Docker image and pushes it to DockerHub.
Trivy Image Scan: Scans the Docker image for security vulnerabilities.
Deploy to Container: Runs the final image on the EC2 instance.
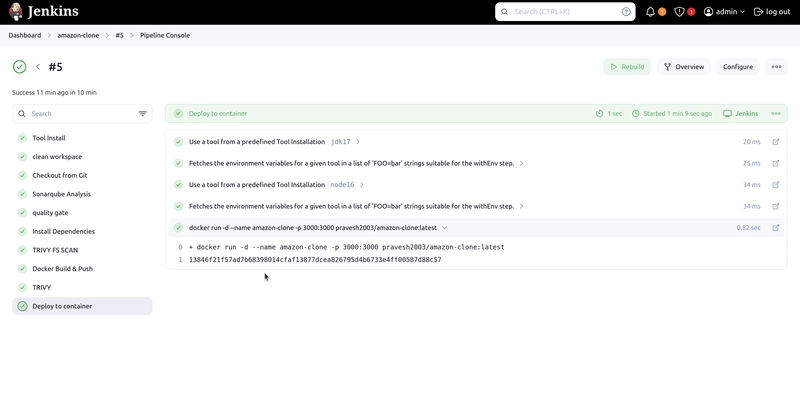
🎉 Step 10: Application Live on EC2
Once the pipeline runs successfully, head to your browser:
http://<Your-EC2-Public-IP>:3000
You’ll see your Amazon Clone application live and ready to go!

You can also visit:
http://<Your-EC2-Public-IP>:9000
To view the SonarQube dasard, including detailed reports on code quality, bugs, and vulnerabilities.

🧹 Step 11: Tear Down AWS Resources (To Save Cost)
Before we wrap up the project, let’s clean up and destroy the infrastructure we created. This is an important habit when working with cloud services — you don’t want to rack up unnecessary charges.
To do that, run the following command from the project directory:
cd amazon-clone/Config
terraform destroy --auto-approve

In a couple of minutes, Terraform will remove all the resources (EC2 instance, security groups, etc.) from your AWS account. 💸💨
✅ Final Thoughts
And that’s a wrap! 🎉
In this hands-on project, you learned how to:
🧪 Test and Dockerize a Node.js application locally
☁️ Provision infrastructure on AWS using Terraform
⚙️ Set up a full CI/CD pipeline with Jenkins
🐳 Build and push Docker images to DockerHub
🔐 Scan for vulnerabilities with Trivy, OWASP Dependency Check, and SonarQube
🚀 Deploy and run your app on an AWS EC2 instance
This end-to-end pipeline is an excellent demonstration of modern DevSecOps practices, combining infrastructure-as-code, CI/CD automation, container security, and static code analysis — all in one place!
If you enjoyed this guide and want to explore more projects around Cloud, DevOps, and AI, feel free to connect with me:
🧑💻 : Pravesh-Sudha
📹 YouTube: pravesh-sudha
📝 Blog: blog.praveshsudha.com
🐦 Twitter: praveshstwt
💼 LinkedIn: Pravesh Sudha
Thanks for reading!
Until next time, keep building, keep learning. 🚀👨💻

Top comments (0)